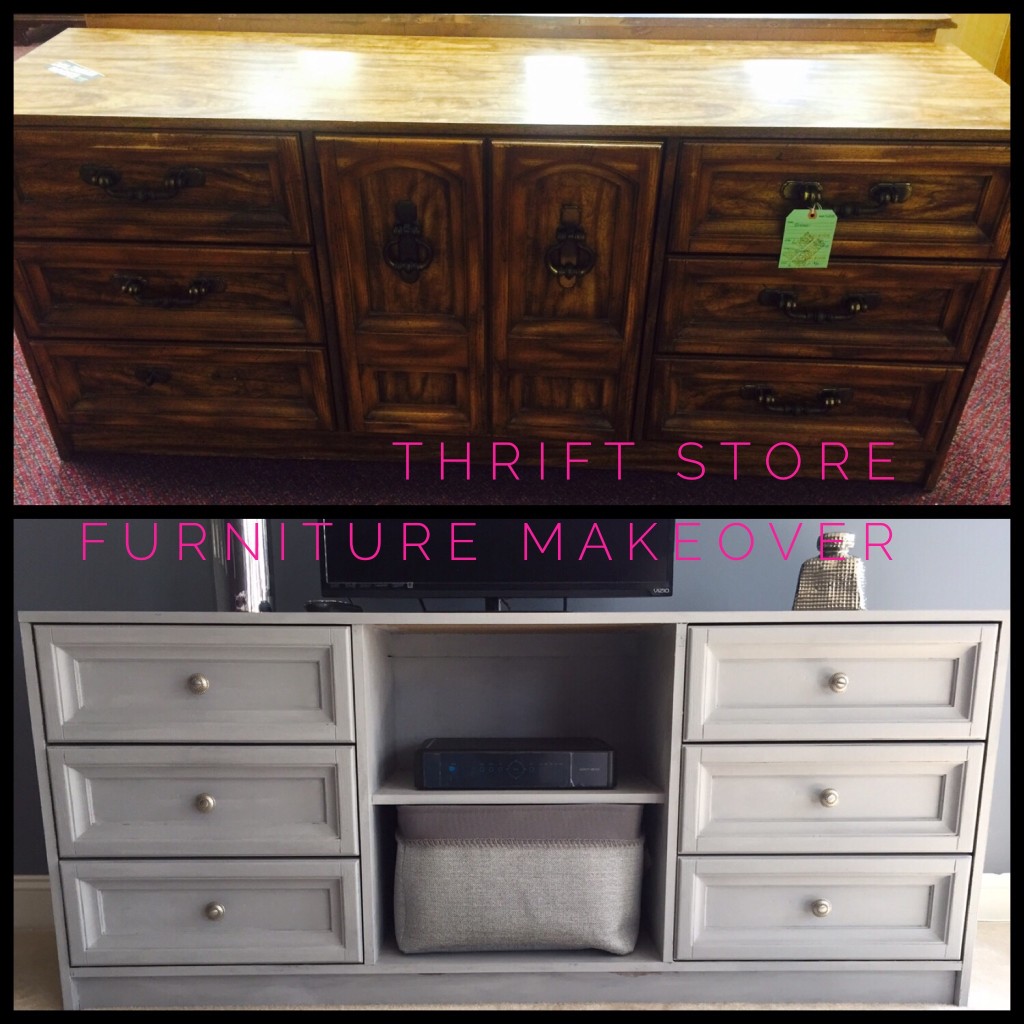
Hello there! Well, here is my latest thrift store furniture transformation. I really debated as to whether or not I wanted to tackle this one. It was so ugly! I didn’t have much hope for this outdated laminate dresser when I spotted it in the thrift store. Plus the price tag was a ridiculous $75, which further discouraged me. Also, I had never tried to transform a piece that was this size.
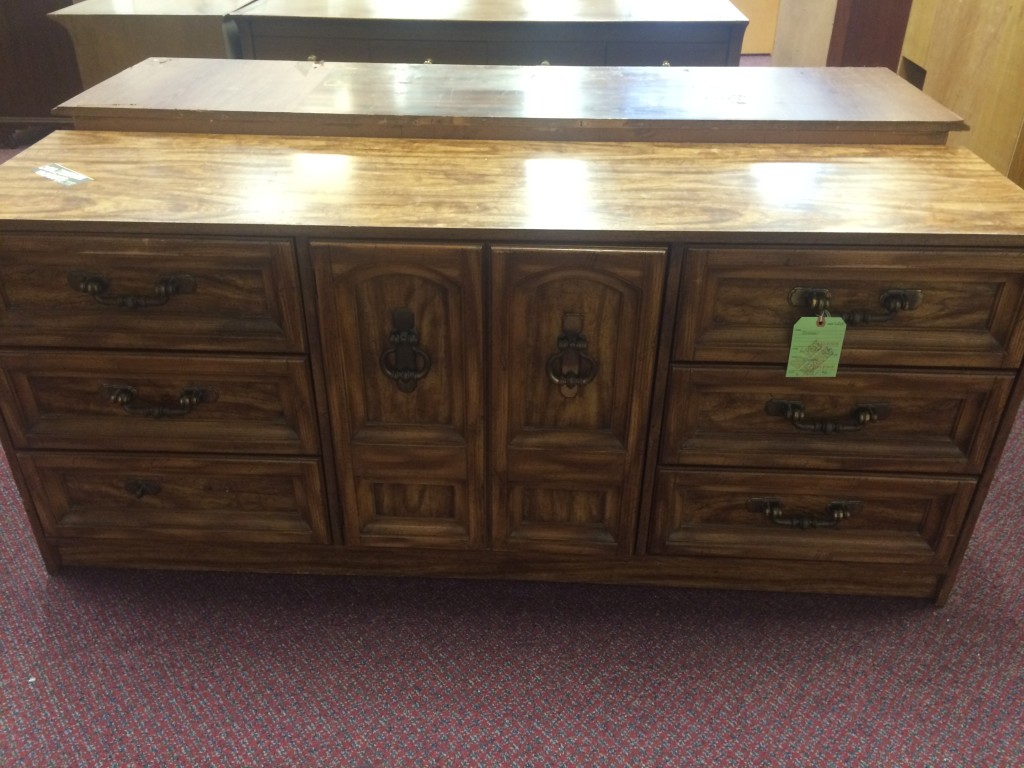
There she is, sitting in the thrift store.
I decided to go ahead and try it since I was making steady progress on my master bedroom decorating (which has been wonderfully decorated mostly with thrift store finds, and products from Etsy, but that’s another blog). I just needed to replace my tiny TV stand (left here by the previous homeowners), with a nice piece of a substantial size. I had located a nice cabinet weeks earlier, but I didn’t purchase it, so someone else got it. I knew I could not afford to think on this piece too long. On my next visit to the thrift store, it was still there, and marked down to $60, so I decided to go for it!
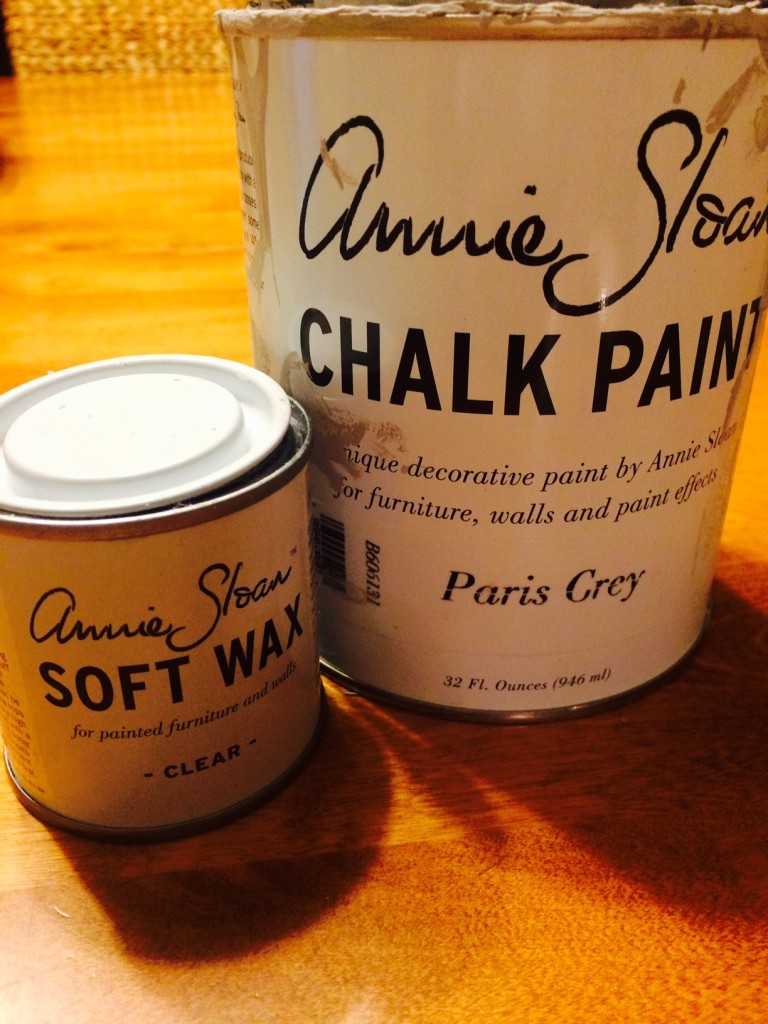
Once I got the piece to my house, it sat in my garage for a day or two until I decided what color gray I wanted to paint it. I went with the wildly Pintrest popular Annie Sloan Chalk Paint in Paris Gray. I had no idea what “chalk paint” was. I also could not figure out why everyone was using it so much. With a little research, I realized the paint wasn’t even sold in my local Lowe’s or Home Depot, so I was really hesitant to give it a try. After a LOT of research on youtube and a few blogs, I realized this pricey paint and its accompanying wax, was supposed to be super easy to apply. Oh and the best part is, NO SANDING OR PRIMING OF FURNITURE WAS REQUIRED! And the best, best part is the paint was sold in a tiny store nearby. Yassssss!
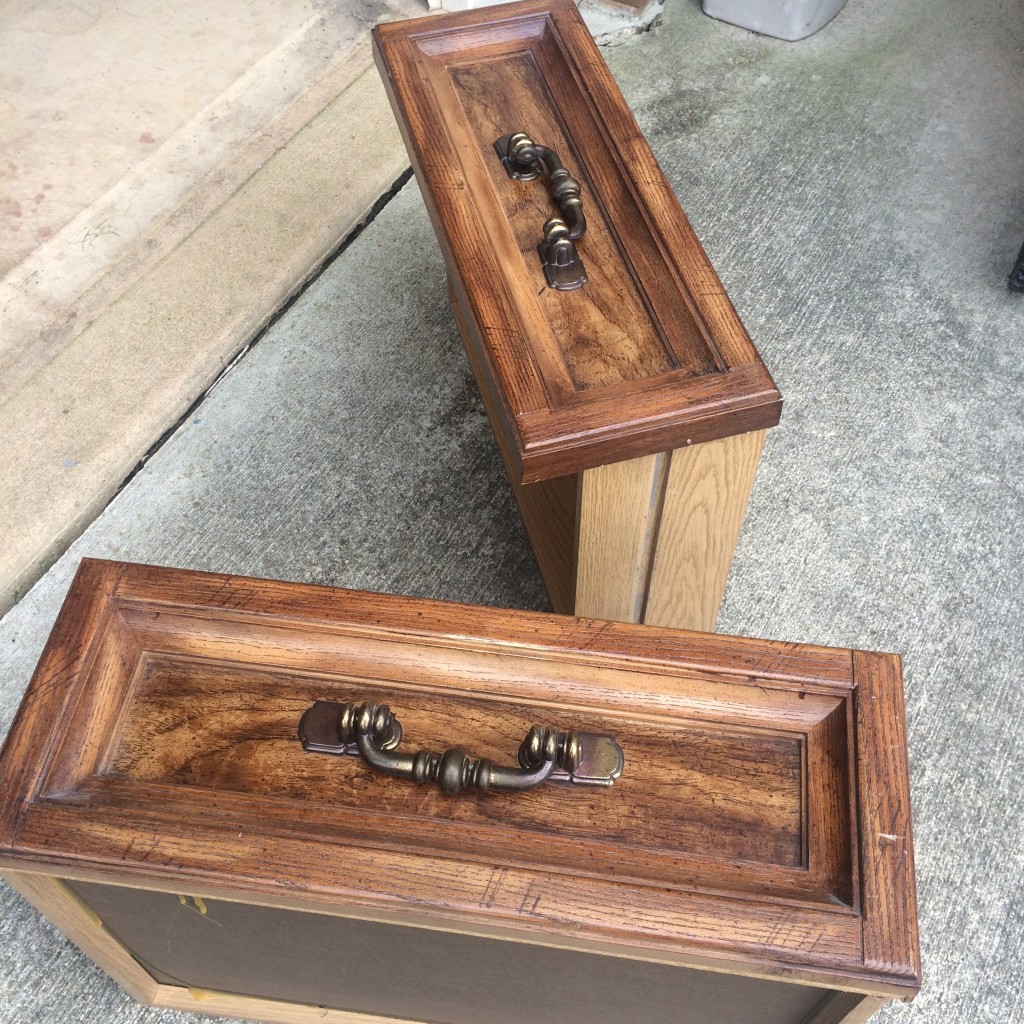
The paint was $36 and the wax was $12, so I spent $48 on the paint and $60 on the dresser. Not too bad, huh? I knew I wanted to replace the hardware, since one of the handles on a drawer was broken. Once I removed the hardware, I discovered it had multiple screws fastening it to the drawer facing. I initially tried to find a replacement for the hardware, but the furniture was so old, it would have required some lengthy research. Also, I tried to find handles to fit in the previous holes, but none of the new handles were made with that exact distance for holes. My only other option was to fill the holes and create a new hole in the center of each drawer for the nice new pulls I picked up at Lowe’s. I bought a new Purdy paint brush to apply my paint as well. The new brush was $15 (I think), and the pulls were $25. That puts me at about $150 spent. I’m not complaining. I can’t go into a store and buy this size and color entertainment cabinet for $150, so I’m good.
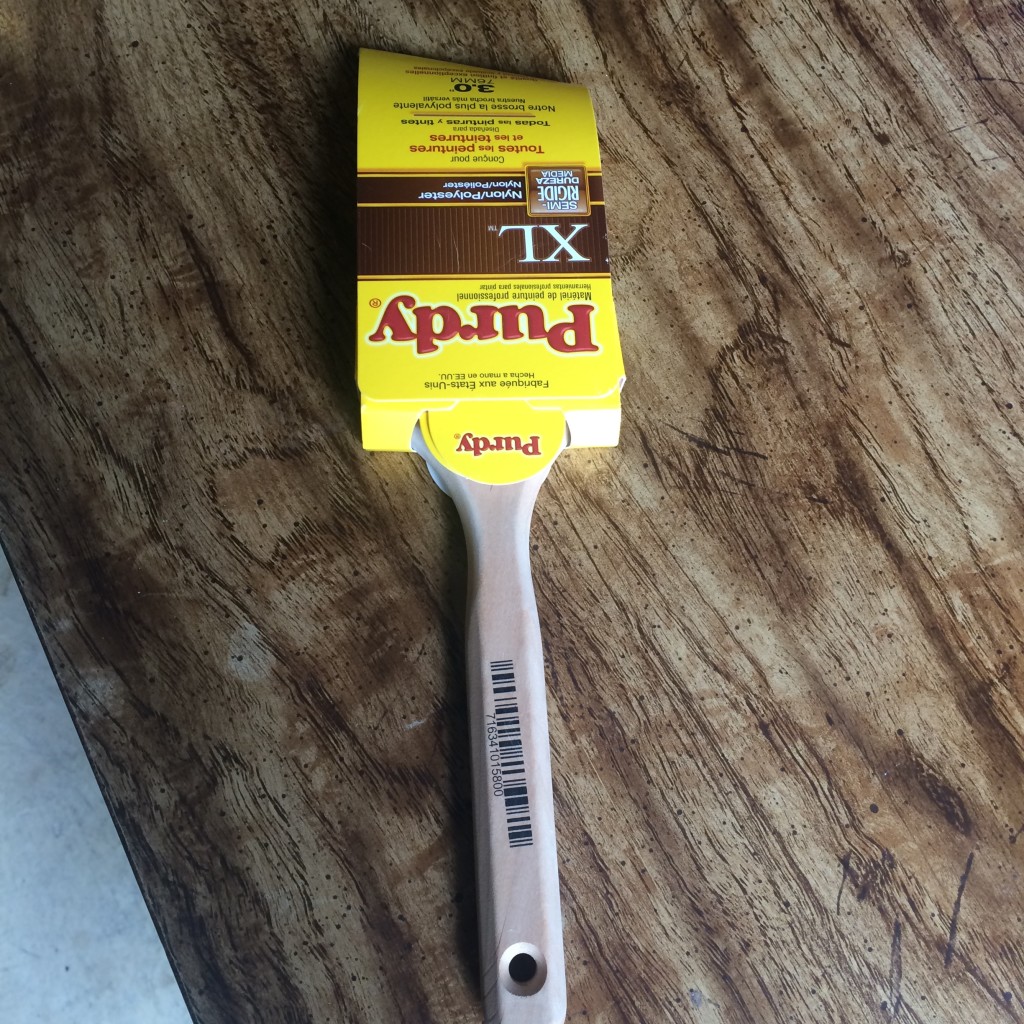
My new Purdy girl!
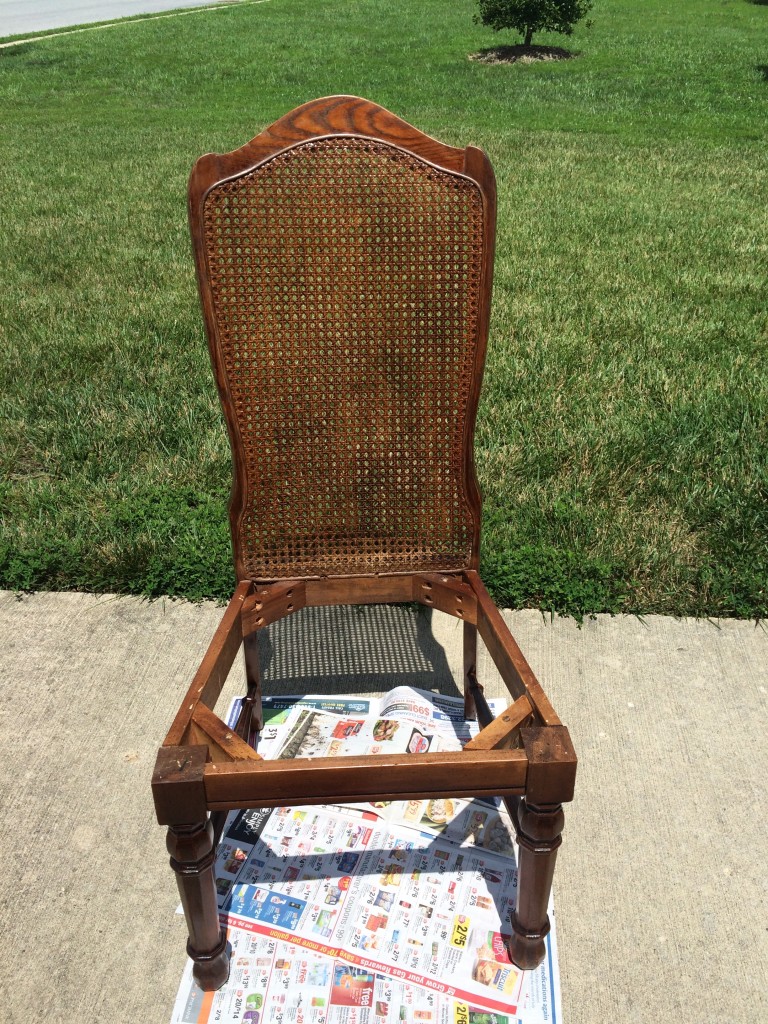
After cleaning out the dresser really good, wiping away all the dust, removing all the hardware, removing all the drawers, and taking off the two front doors (which I knew I wanted to leave off so the shelves could be exposed), I was ready to transform my thrift store find! I kept this blog post in mind to inspire me during the process, because I loved the outcome of this piece.
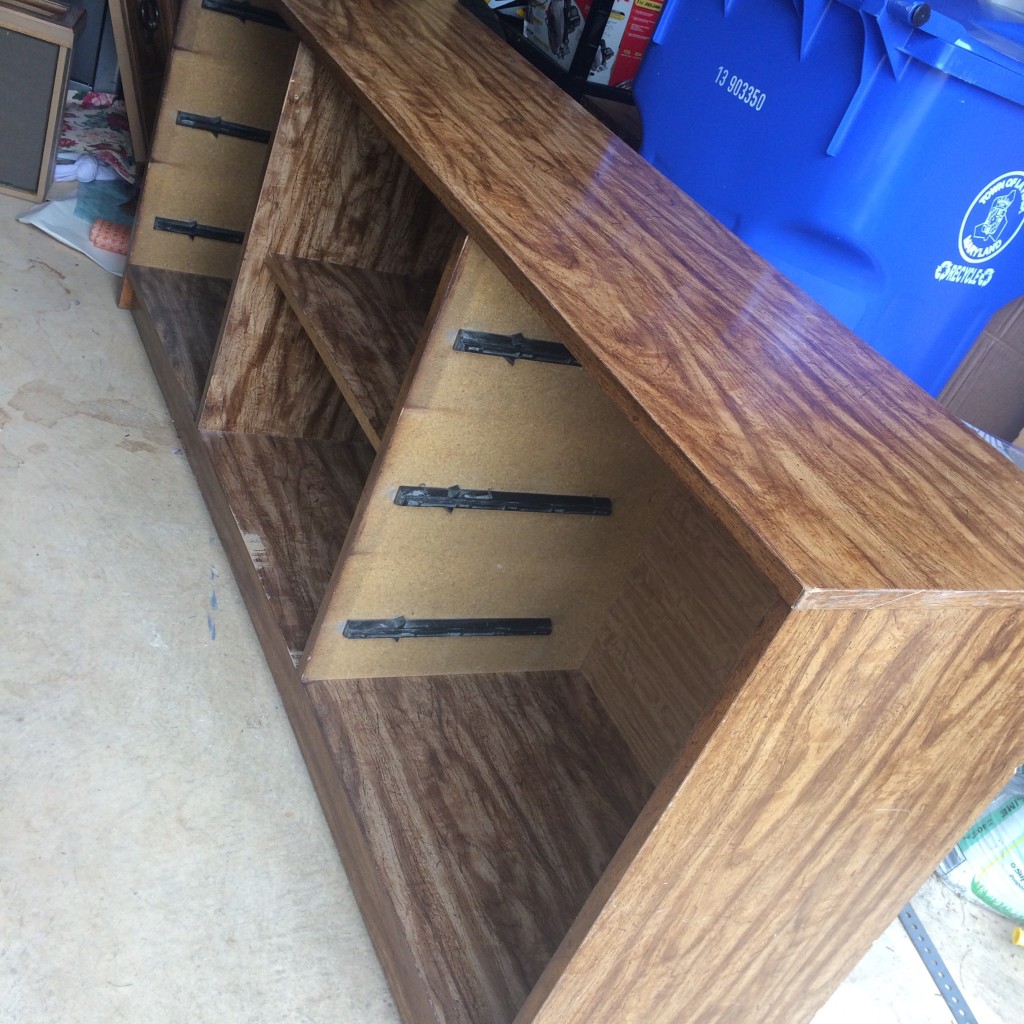
Cleaned and ready to go.
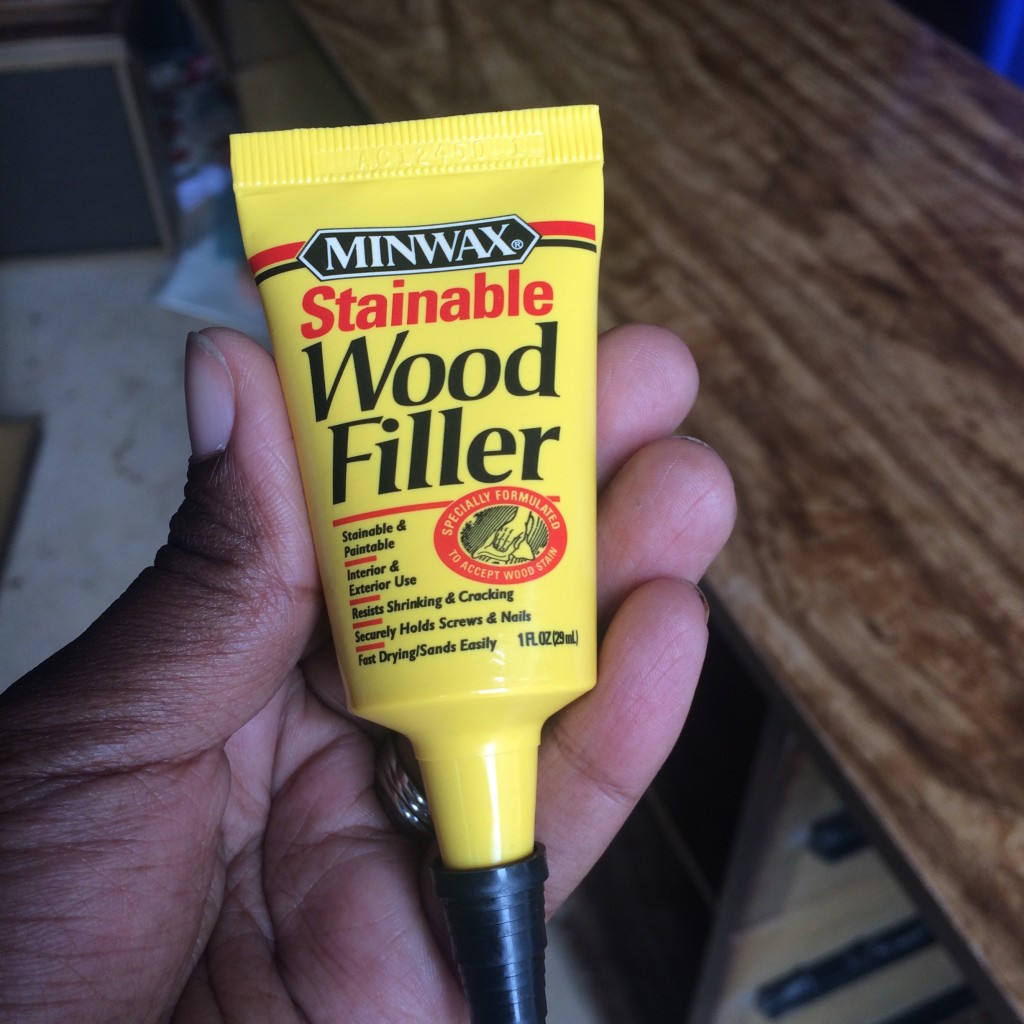
First, I removed all the drawers and filled the holes with this wood filler, then sanded over the filled holes with my fine grit sanding block for a smooth look (follow directions on the tube).
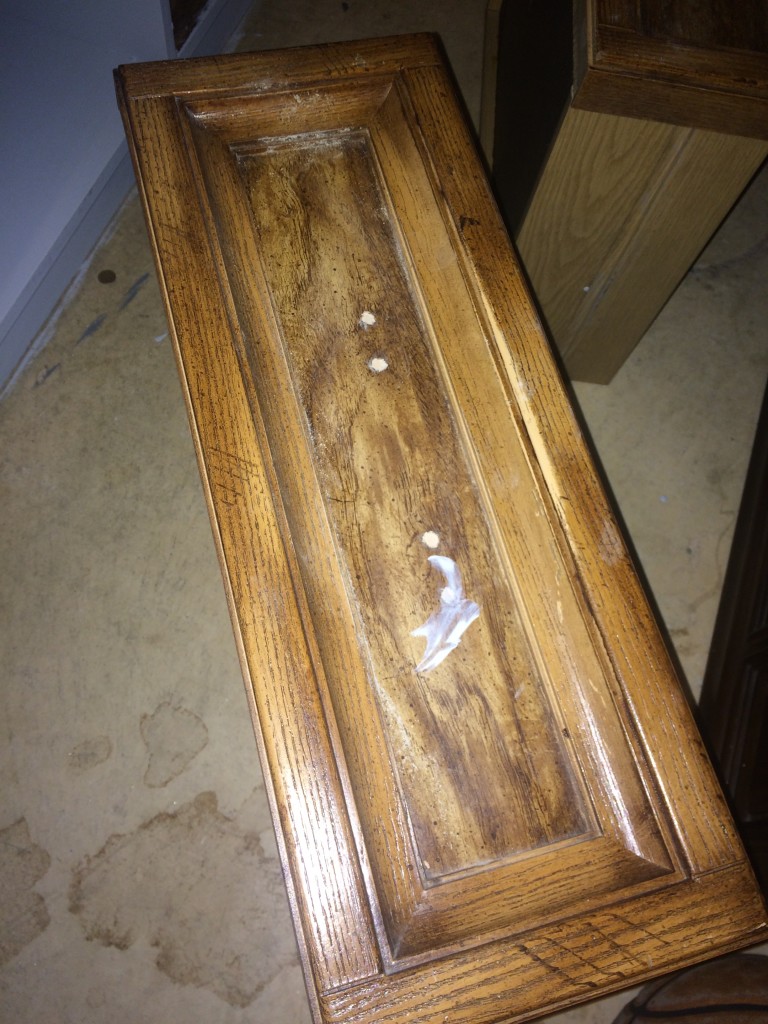
I tackled applying my first coat of Annie Sloan Chalk Paint to the frame of the dresser. The texture and application is much different from regular paint, but it went on pretty smooth with my Purdy brush. Some people dilute the paint with water, but I did not. Several people also use the special Annie Sloan Paint Brush, but I just used my Purdy. By the way, I had to paint in this small garage space due to the threat of rain outside. I applied the second coat of paint some hours later and as it dried, I worked on the drawers some more (filling the holes more where needed, and applying the first coat of paint).
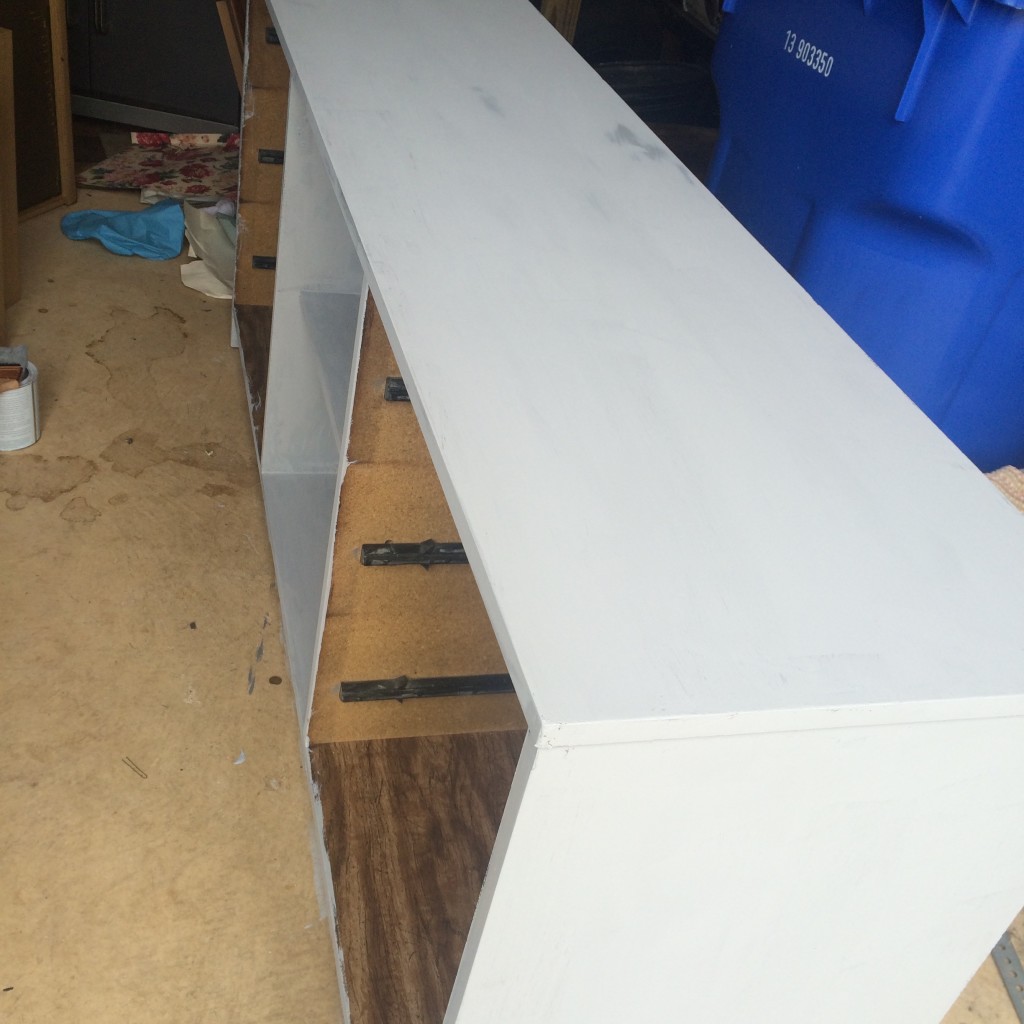
Finally, once everything was painted with two coats of paint, I applied the wax using a piece of an old t-shirt. I literally applied the butter textured wax in a circular motion with the piece of t-shirt, and then wiped it off. I worked in small sections at a time with the wax, because it dries quickly. It really gave me the exact sheen and depth of color I was looking for. I was somewhat concerned initially with the way the first and second coat of paint dried. Plus my husband and son both thought it looked like white paint. Uhhh oh….
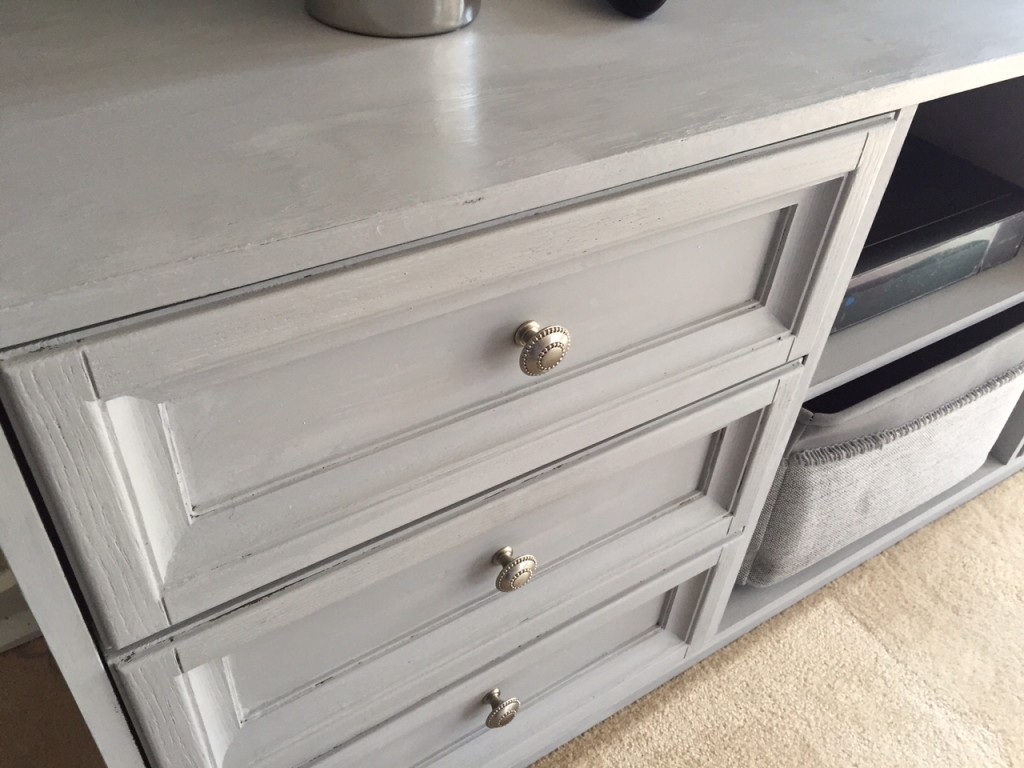
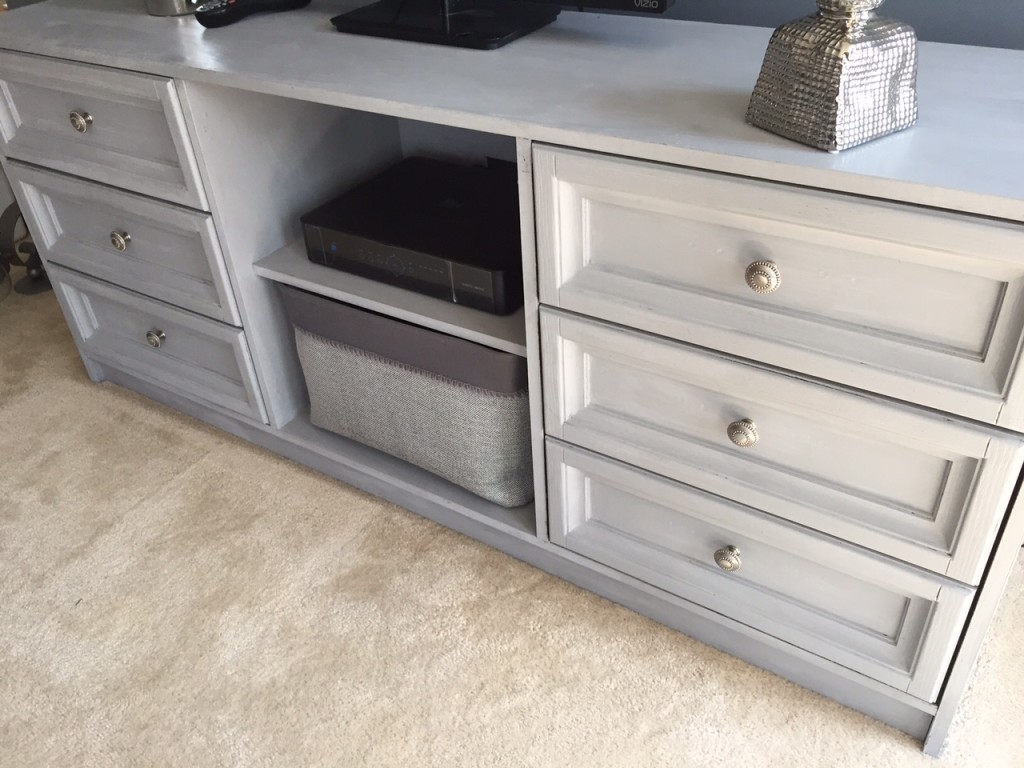
Once everything was waxed, and the wax dried overnight, I had my hubby drill the new holes in the center of my drawer faces, and apply the new hardware. I wanted a nailhead trim look to coordinate with my headboard, so I felt so blessed to find pulls with a nailhead trim look! I had my hubby cut out a small hole in the back, just above the top shelf, to fish the wires through for our DVR, and eventually a DVD player, and other electronics. I found the perfect gray basket in my favorite store of earth, Homegoods, for $15. I’m using it to house extra throw blankets. The drawers will hold books and things that have been sitting around in baskets.
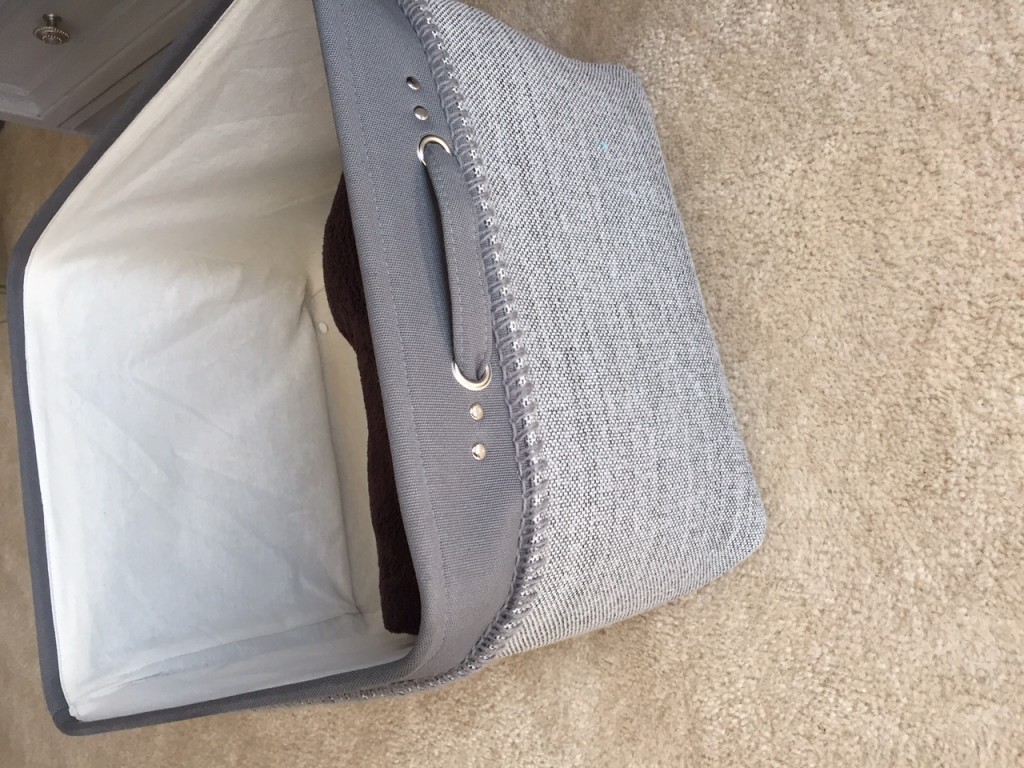
My awesome basket from Homegoods
Overall, I am pleased with the outcome. My new TV cabinet really looks great in my space! Be sure to leave your comments and questions here on my blog! Thanks so much for reading. As always, I hope you are inspired to tackle your own thrift store finds!

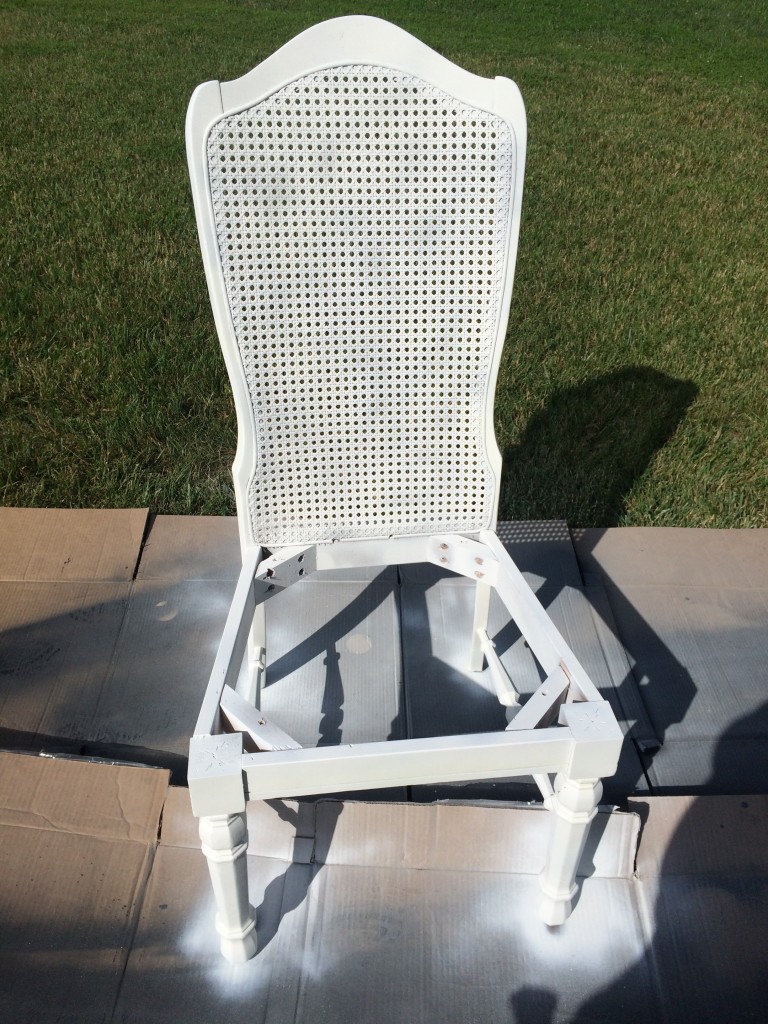
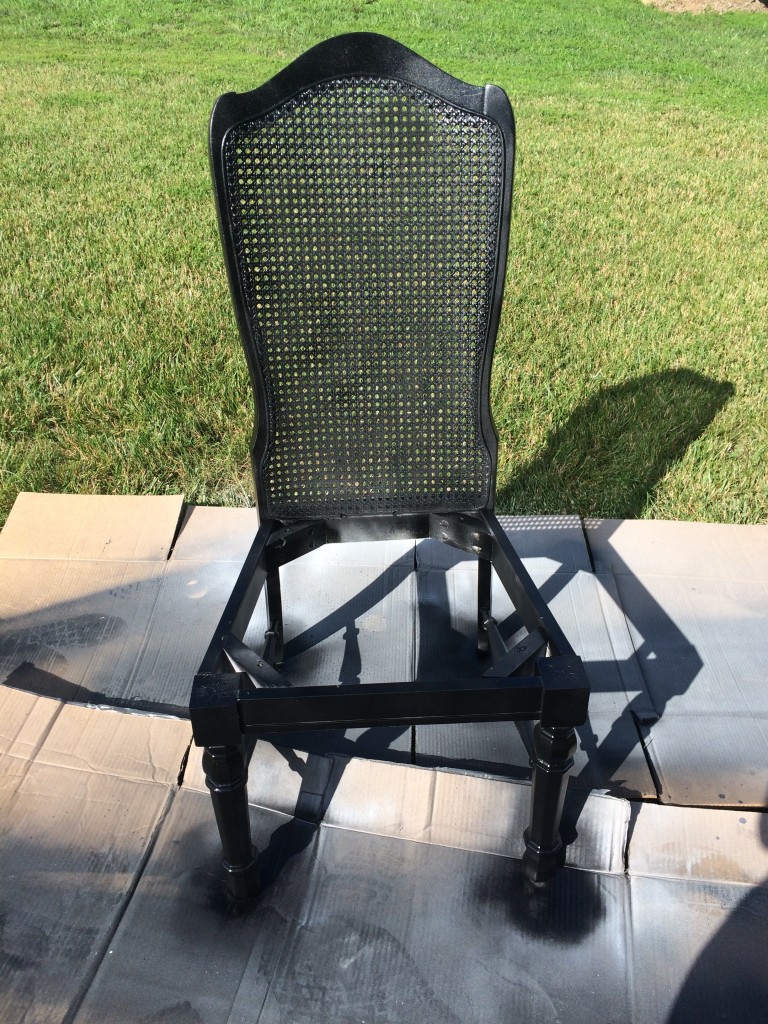
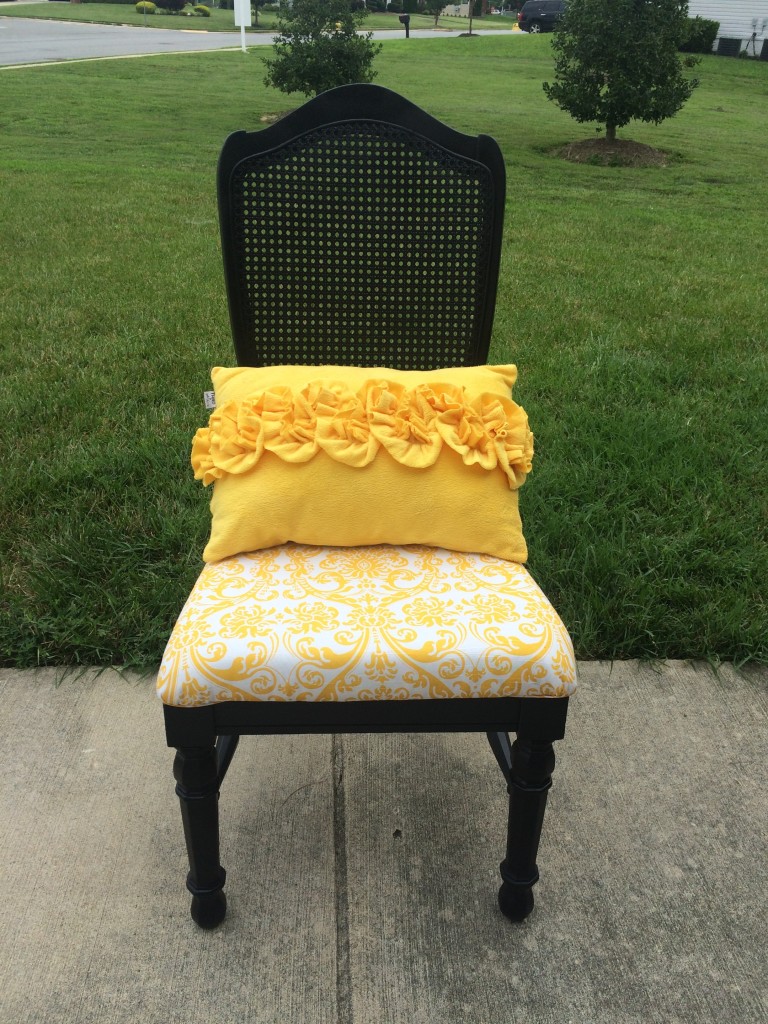
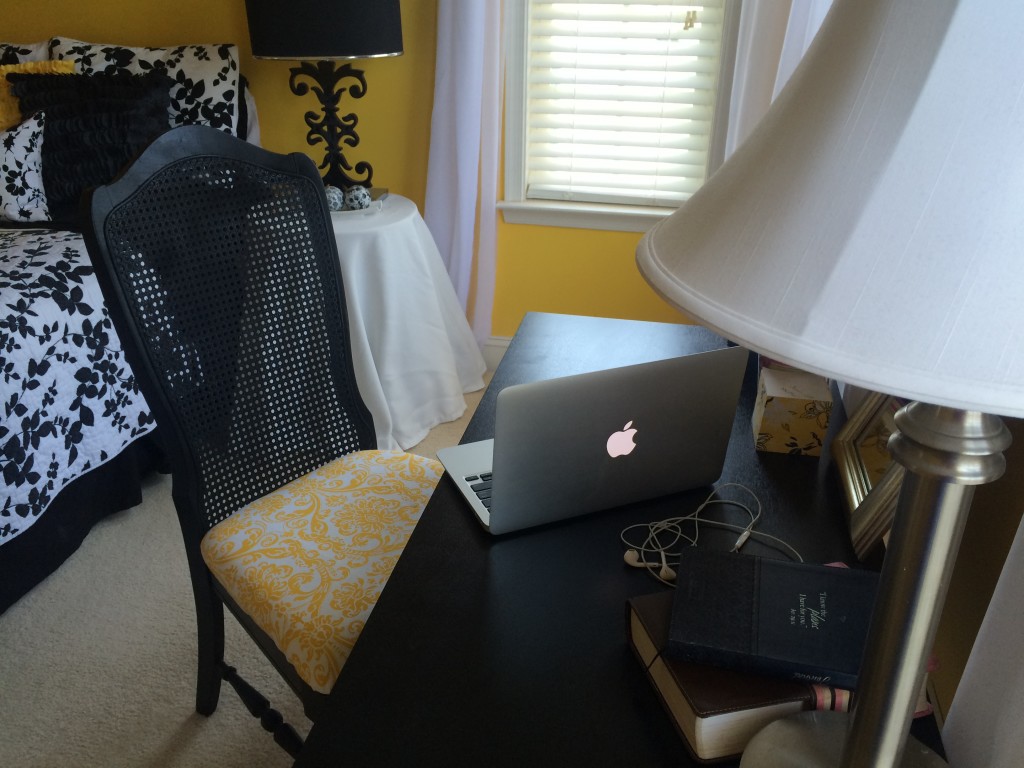
 I am learning more and more to embrace the rhythm of my life and enjoy every season. There are times when my life is fast paced, and filled with adventurous travel on a weekly basis. During those times I am extremely busy, I barely see my home, and when I do see my home, I just like to relax in it. Other times, things are slower. Many times the slowness comes without warning, and my brain is still in busy mode, unaware that things around me have slowed down. Finally, it all catches up to me, and I surrender and learn to take advantage of the moments I have to stop and smell the roses. During the slow times, I try to productively occupy myself with the things I love to do. I read books more, blog more, entertain people at our home, etc. But one of my favorite things to do is tackle a decorating project in my home. My home is my retreat space. There is a certain feel I want to experience when I walk into it, and I am willing to invest the time and effort it takes to create the space I love.